This article will guide you on how to add resources in Microsoft Exchange/ Office 365
To create a resource you will need to have Administrator rights from your email service provider.
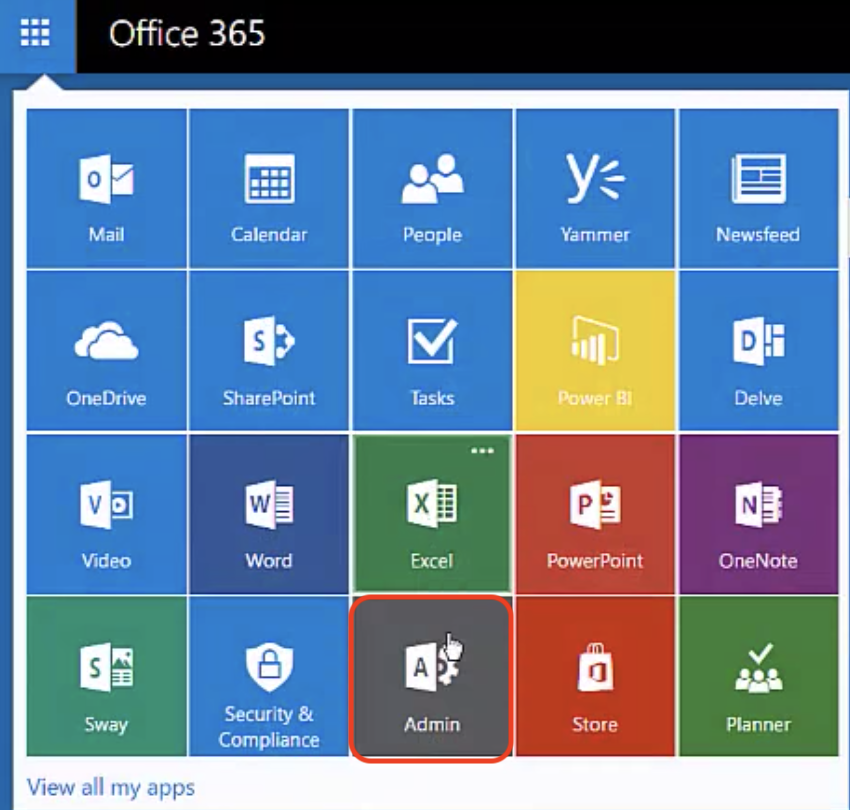
- Once you have administrator rights select the Microsoft Apps icon on the top left.
- Next select the Admin icon
- This will now take you to the Admin Center.
- The next step will be to select the Resources tab
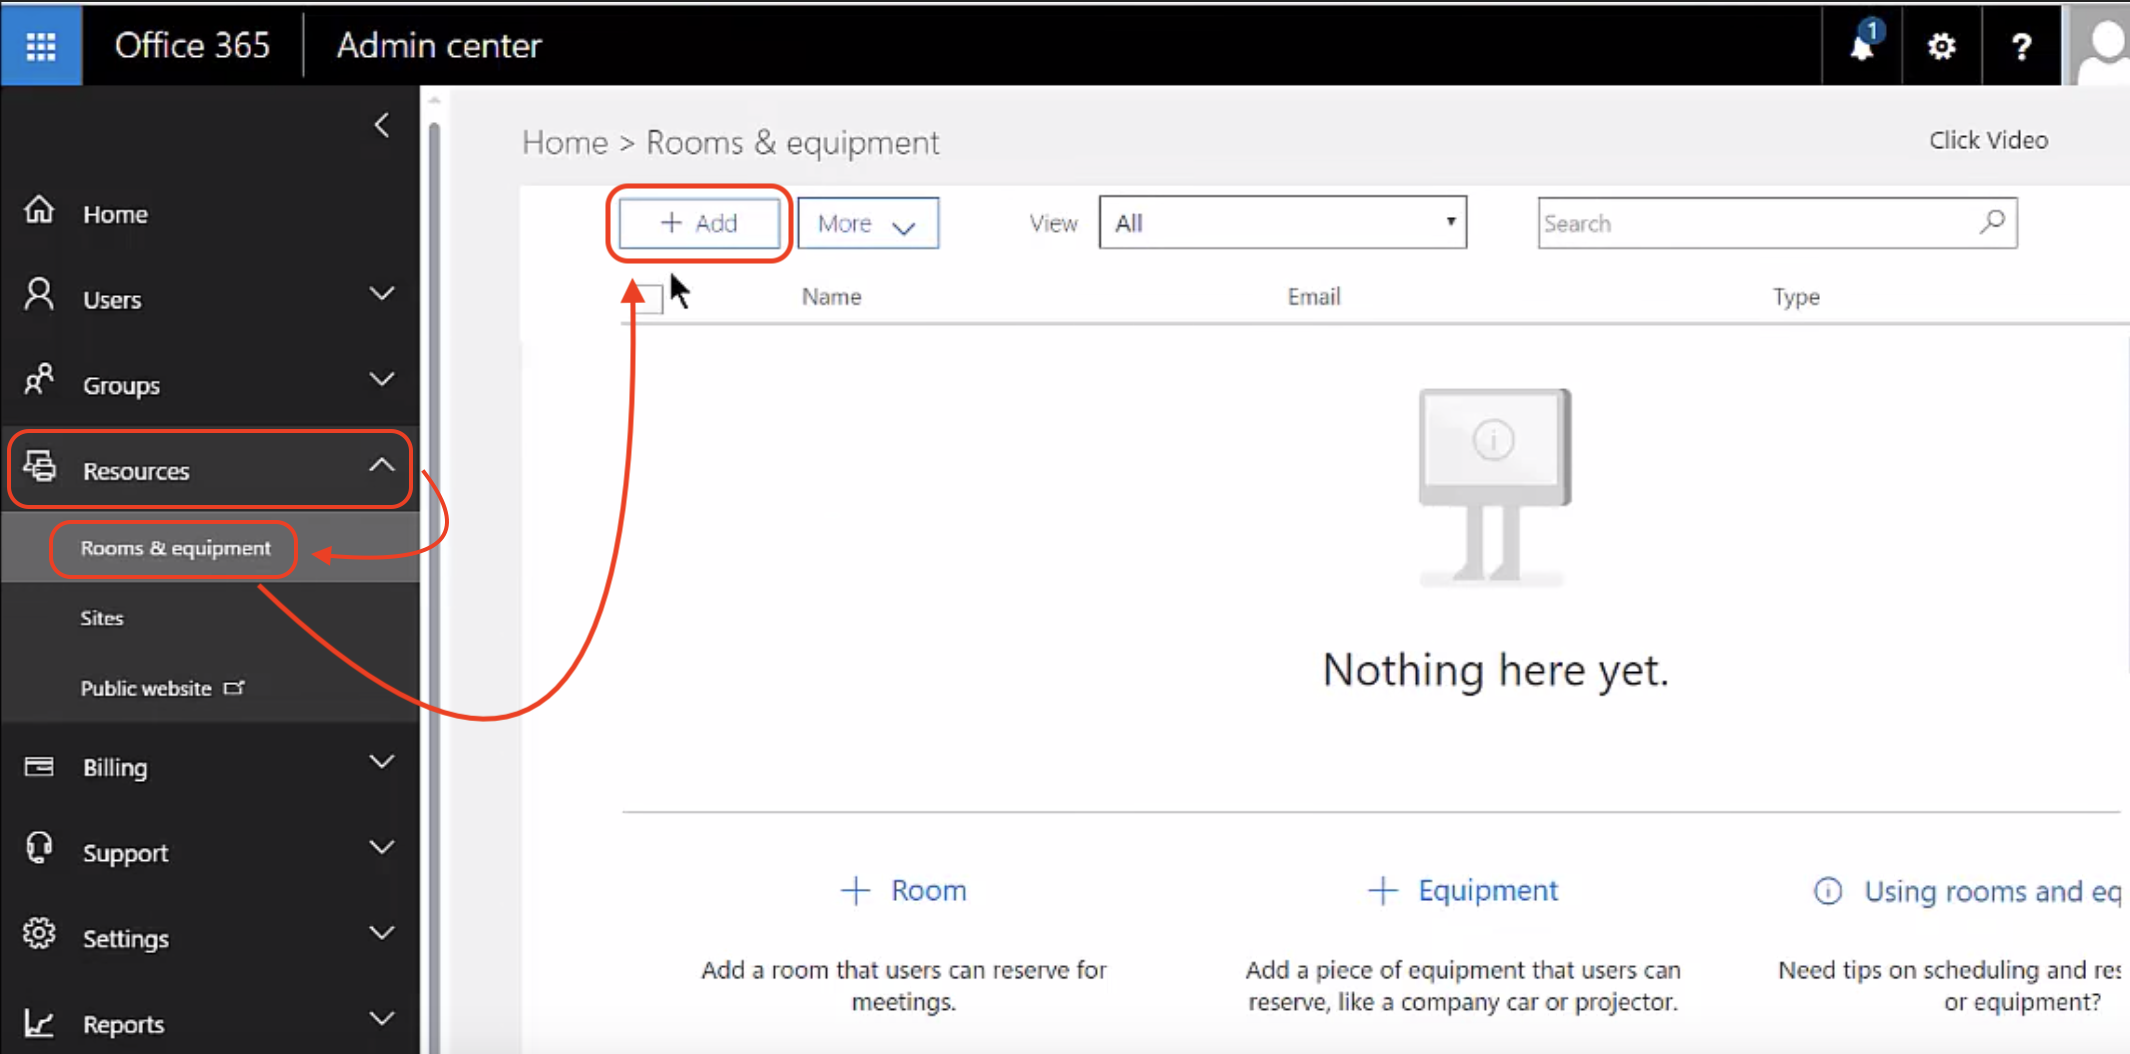
- once the resource tab is open select Rooms & Equipment this will now display all of the rooms and equipments.
- Select Add to add a resource.
- On the New Resource page select the type of resource from room or equipment.
- Create the name and email attached to the resource.
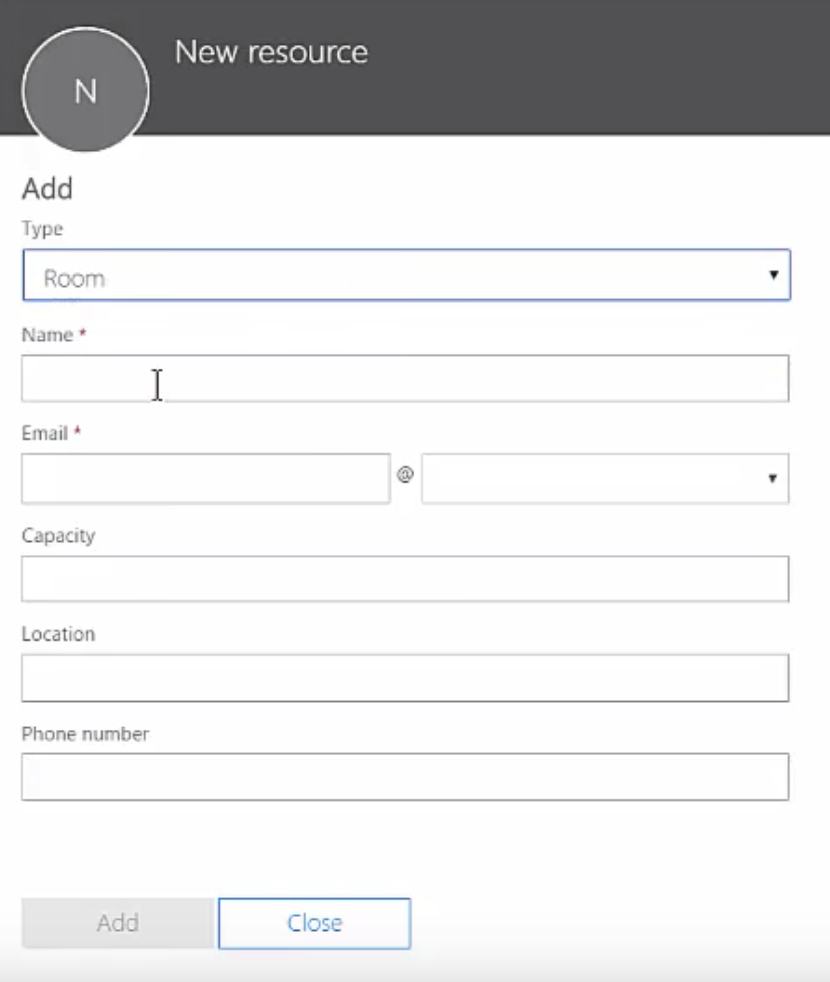
- Once all of the required fields are populated select Add to create the resource.
- The resource will now be available and listed in the resources and equipment.
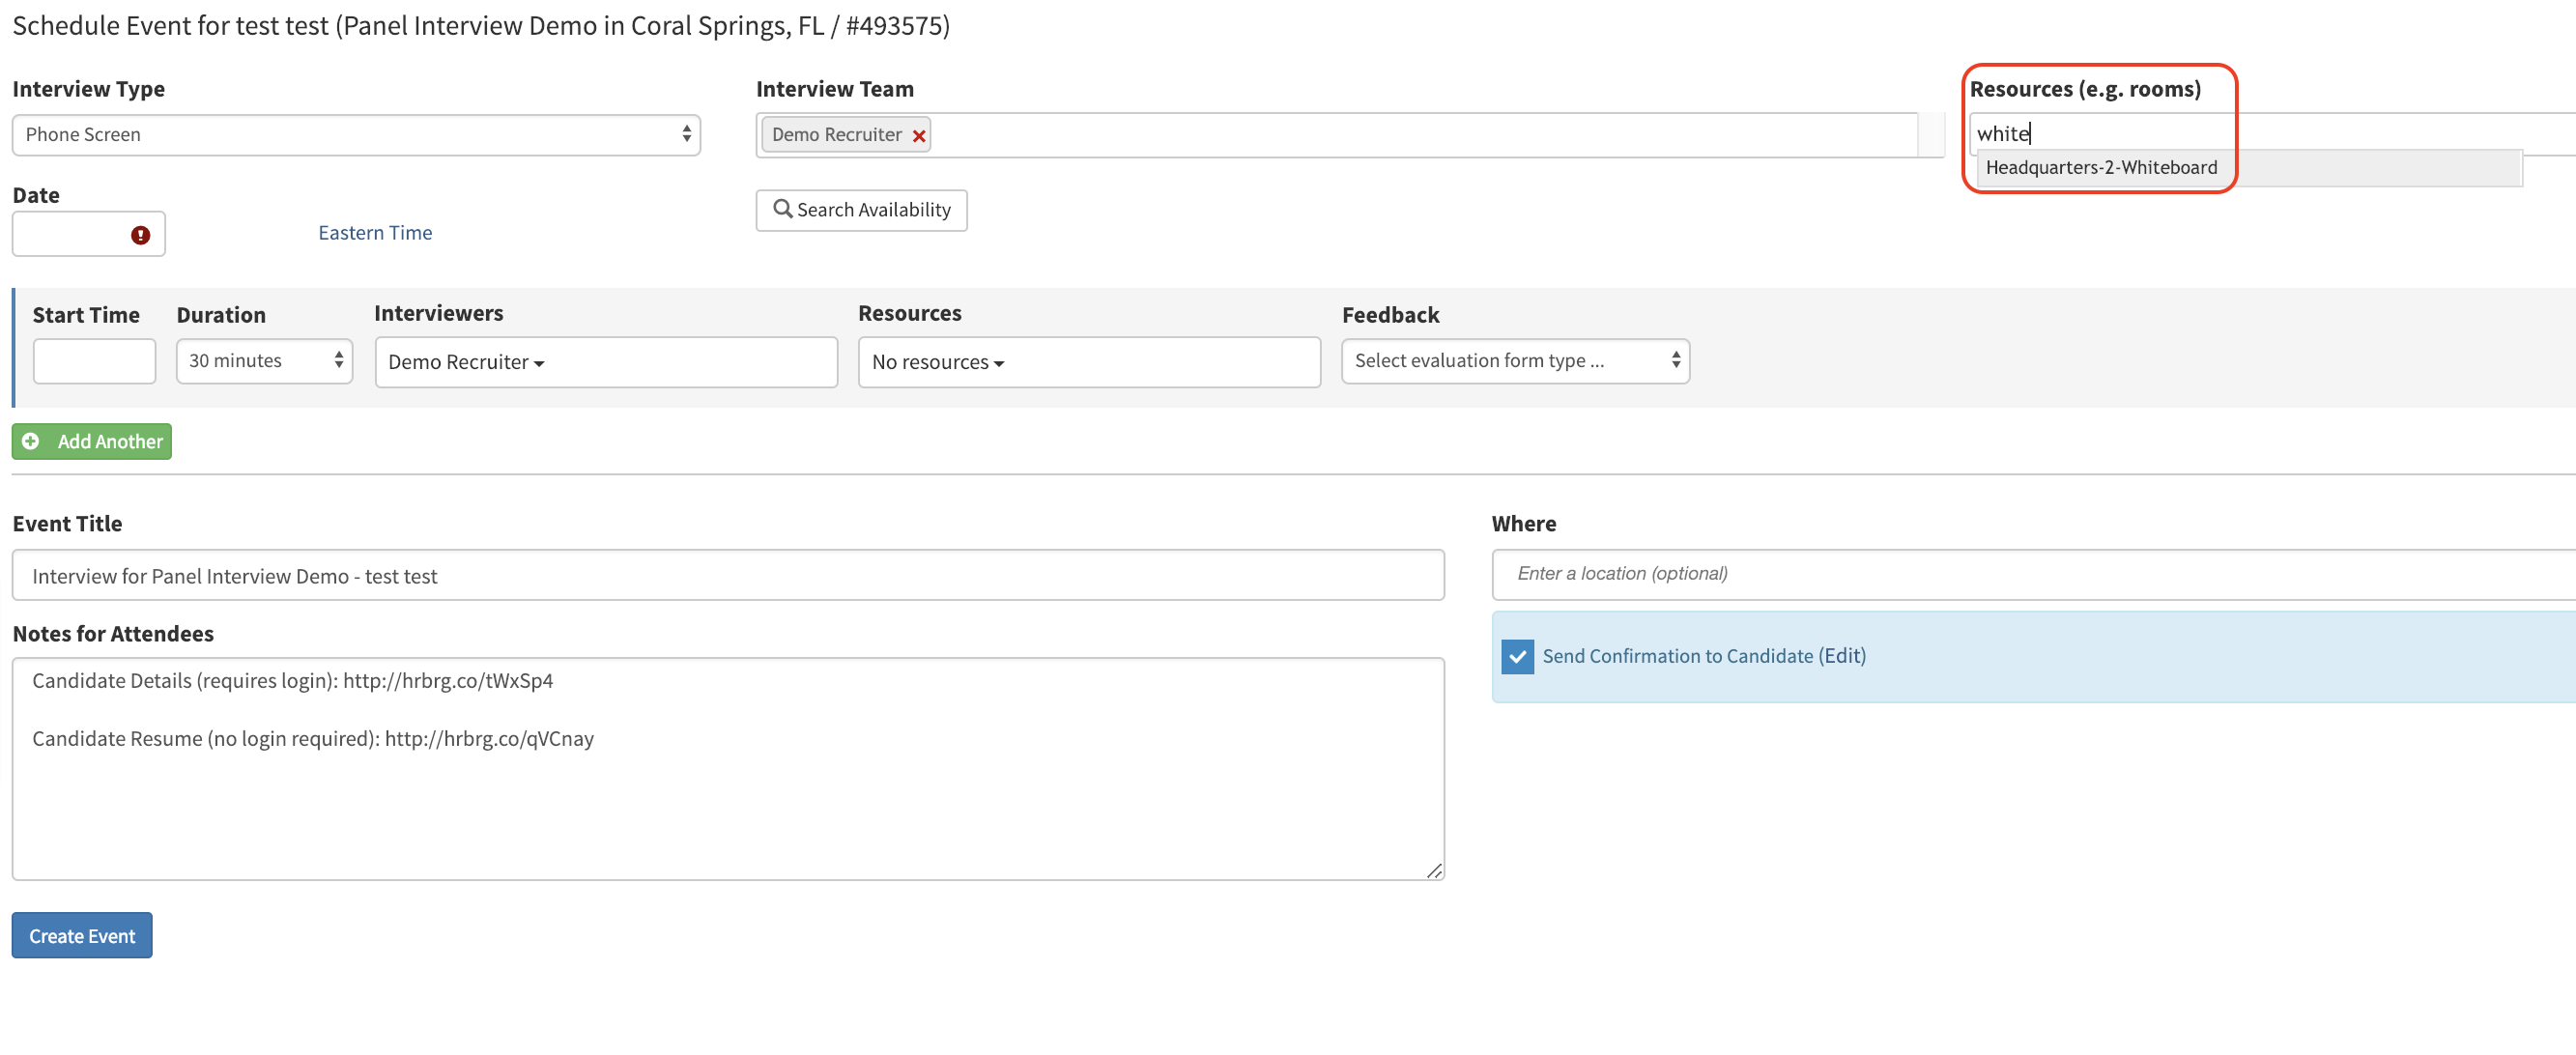
- After you having your resources setup Hirebridge will detect if resources are setup and they will become available in the Resources section in the Panel interview.
- To select a resource use the type ahead feature and type the name of the resource and select the resource from the dropdown list menu.
Note: If you have the resource created and still do not see the resource text box please check if you have Panel Interviews activated. Below is the link to how to activate panel interviews.
How to Activate Panel Interview
If you still do not see the resources textbox please check to see if your calendar account is connected to Hirebridge.