This article will give you an overview of the Panel Interview Scheduler and how to create a panel Interview.
(Image of Panel Interview Scheduler below)
Requirements
- Panel Interview activated.
For instructions on how to Activate Panel Interview Click Here. - Mail/calendar setup with Panel Interview to sync calendars.
For instructions on how to setup your email/calendar with Hirebridge Click Here. - Preference if you are a coordinator and do/do not automatically want to include yourself as part of the interviewing team.
For instructions on how to change your in preferences Click Here.
Once all of these settings are set we will now cover the Panel Interview in sections.
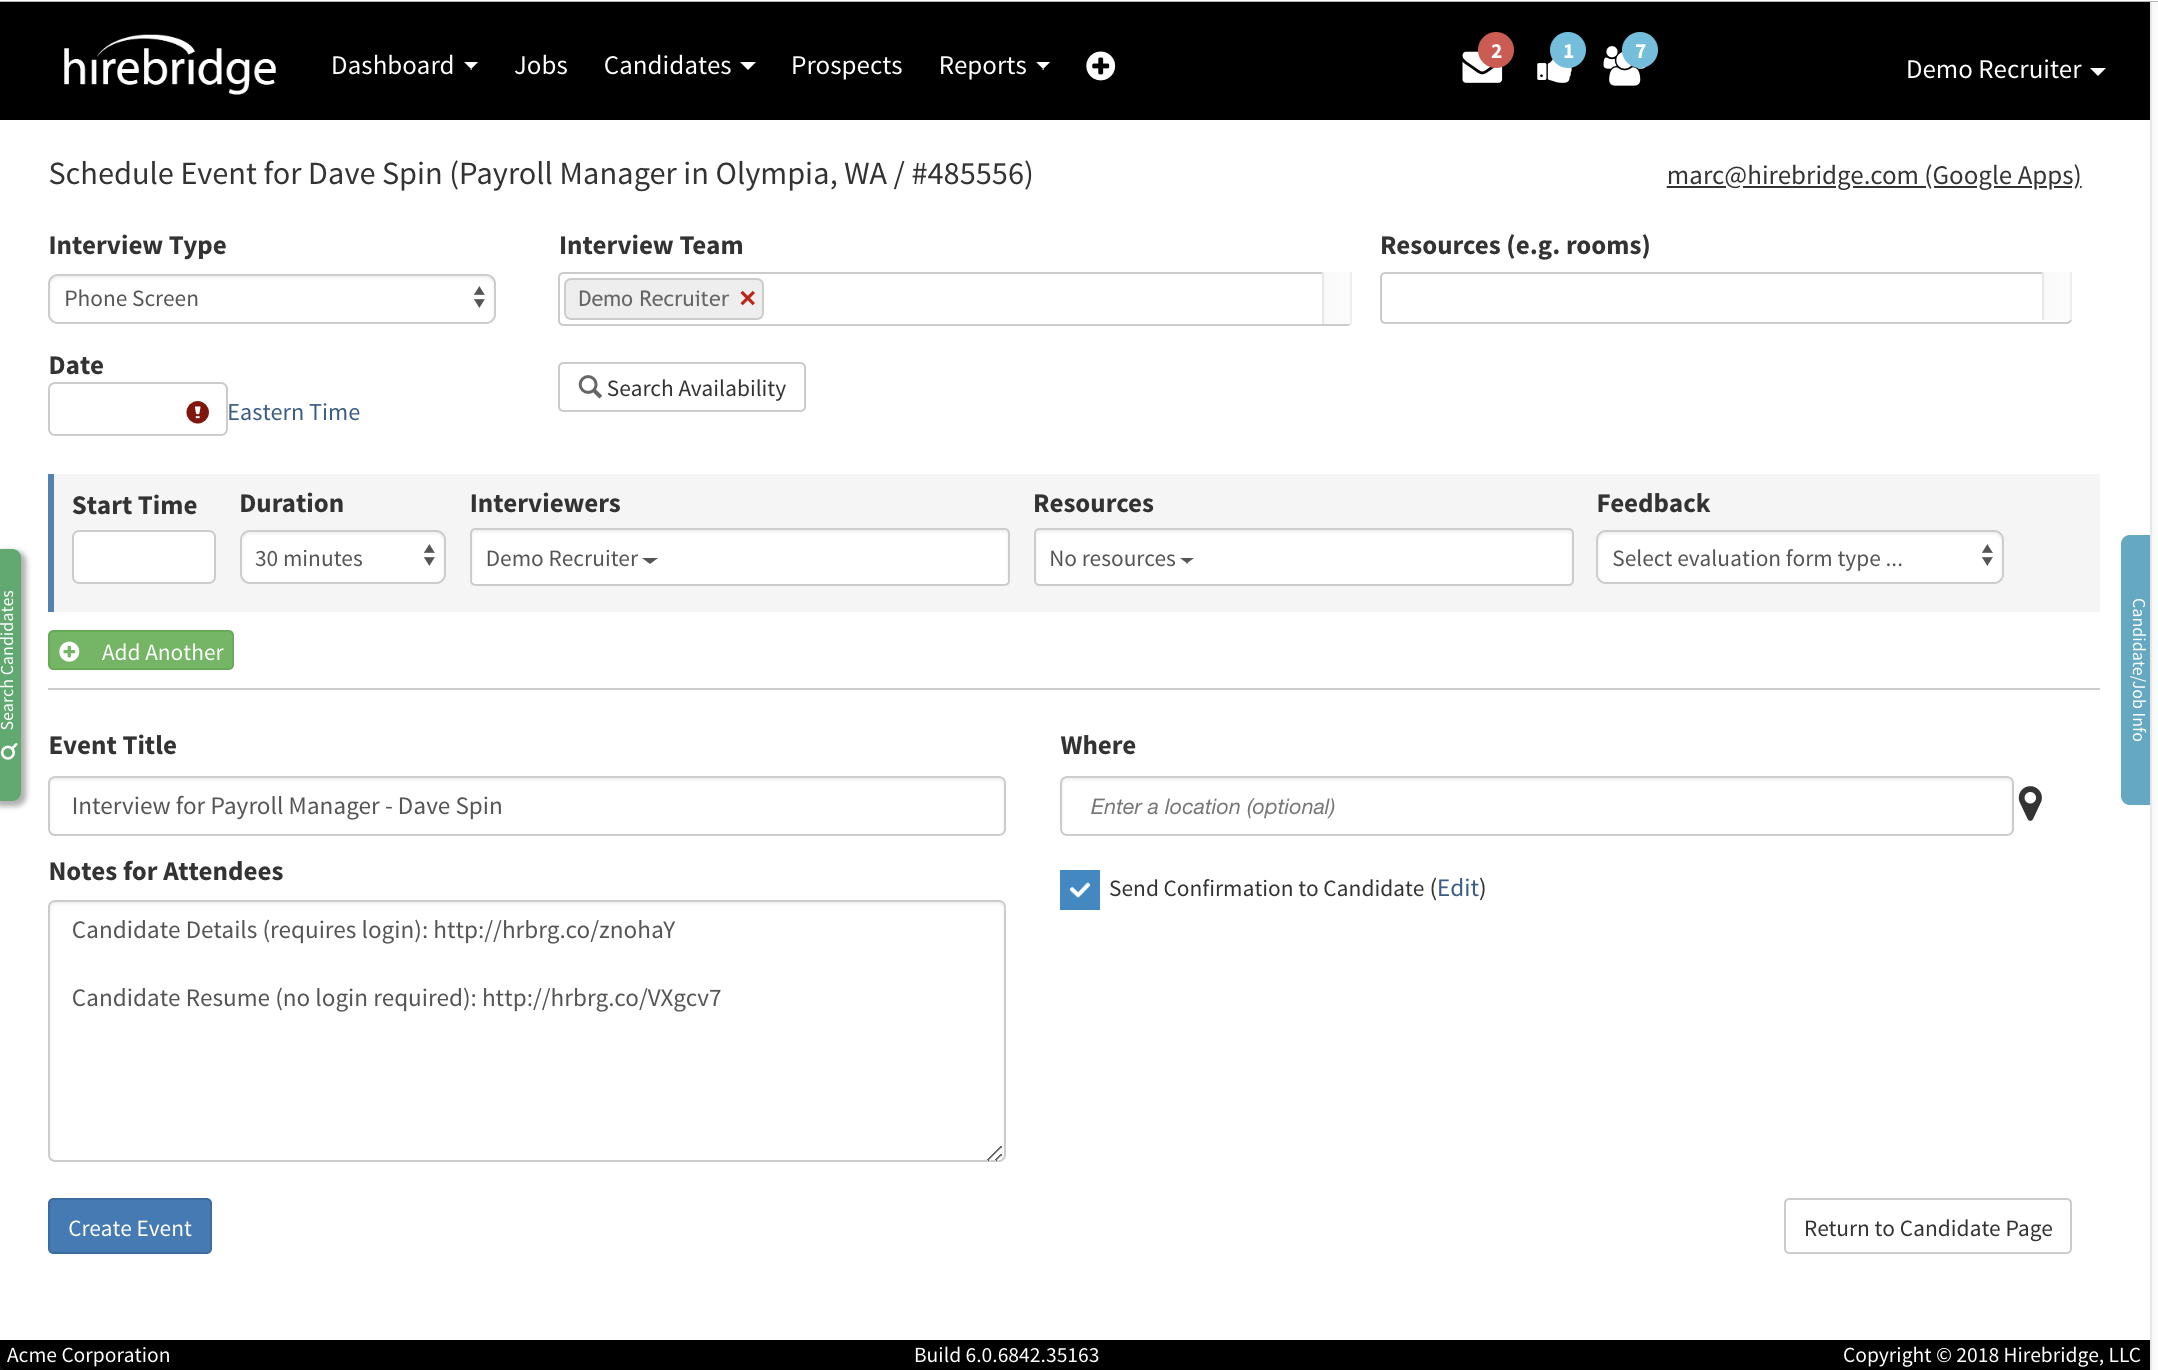
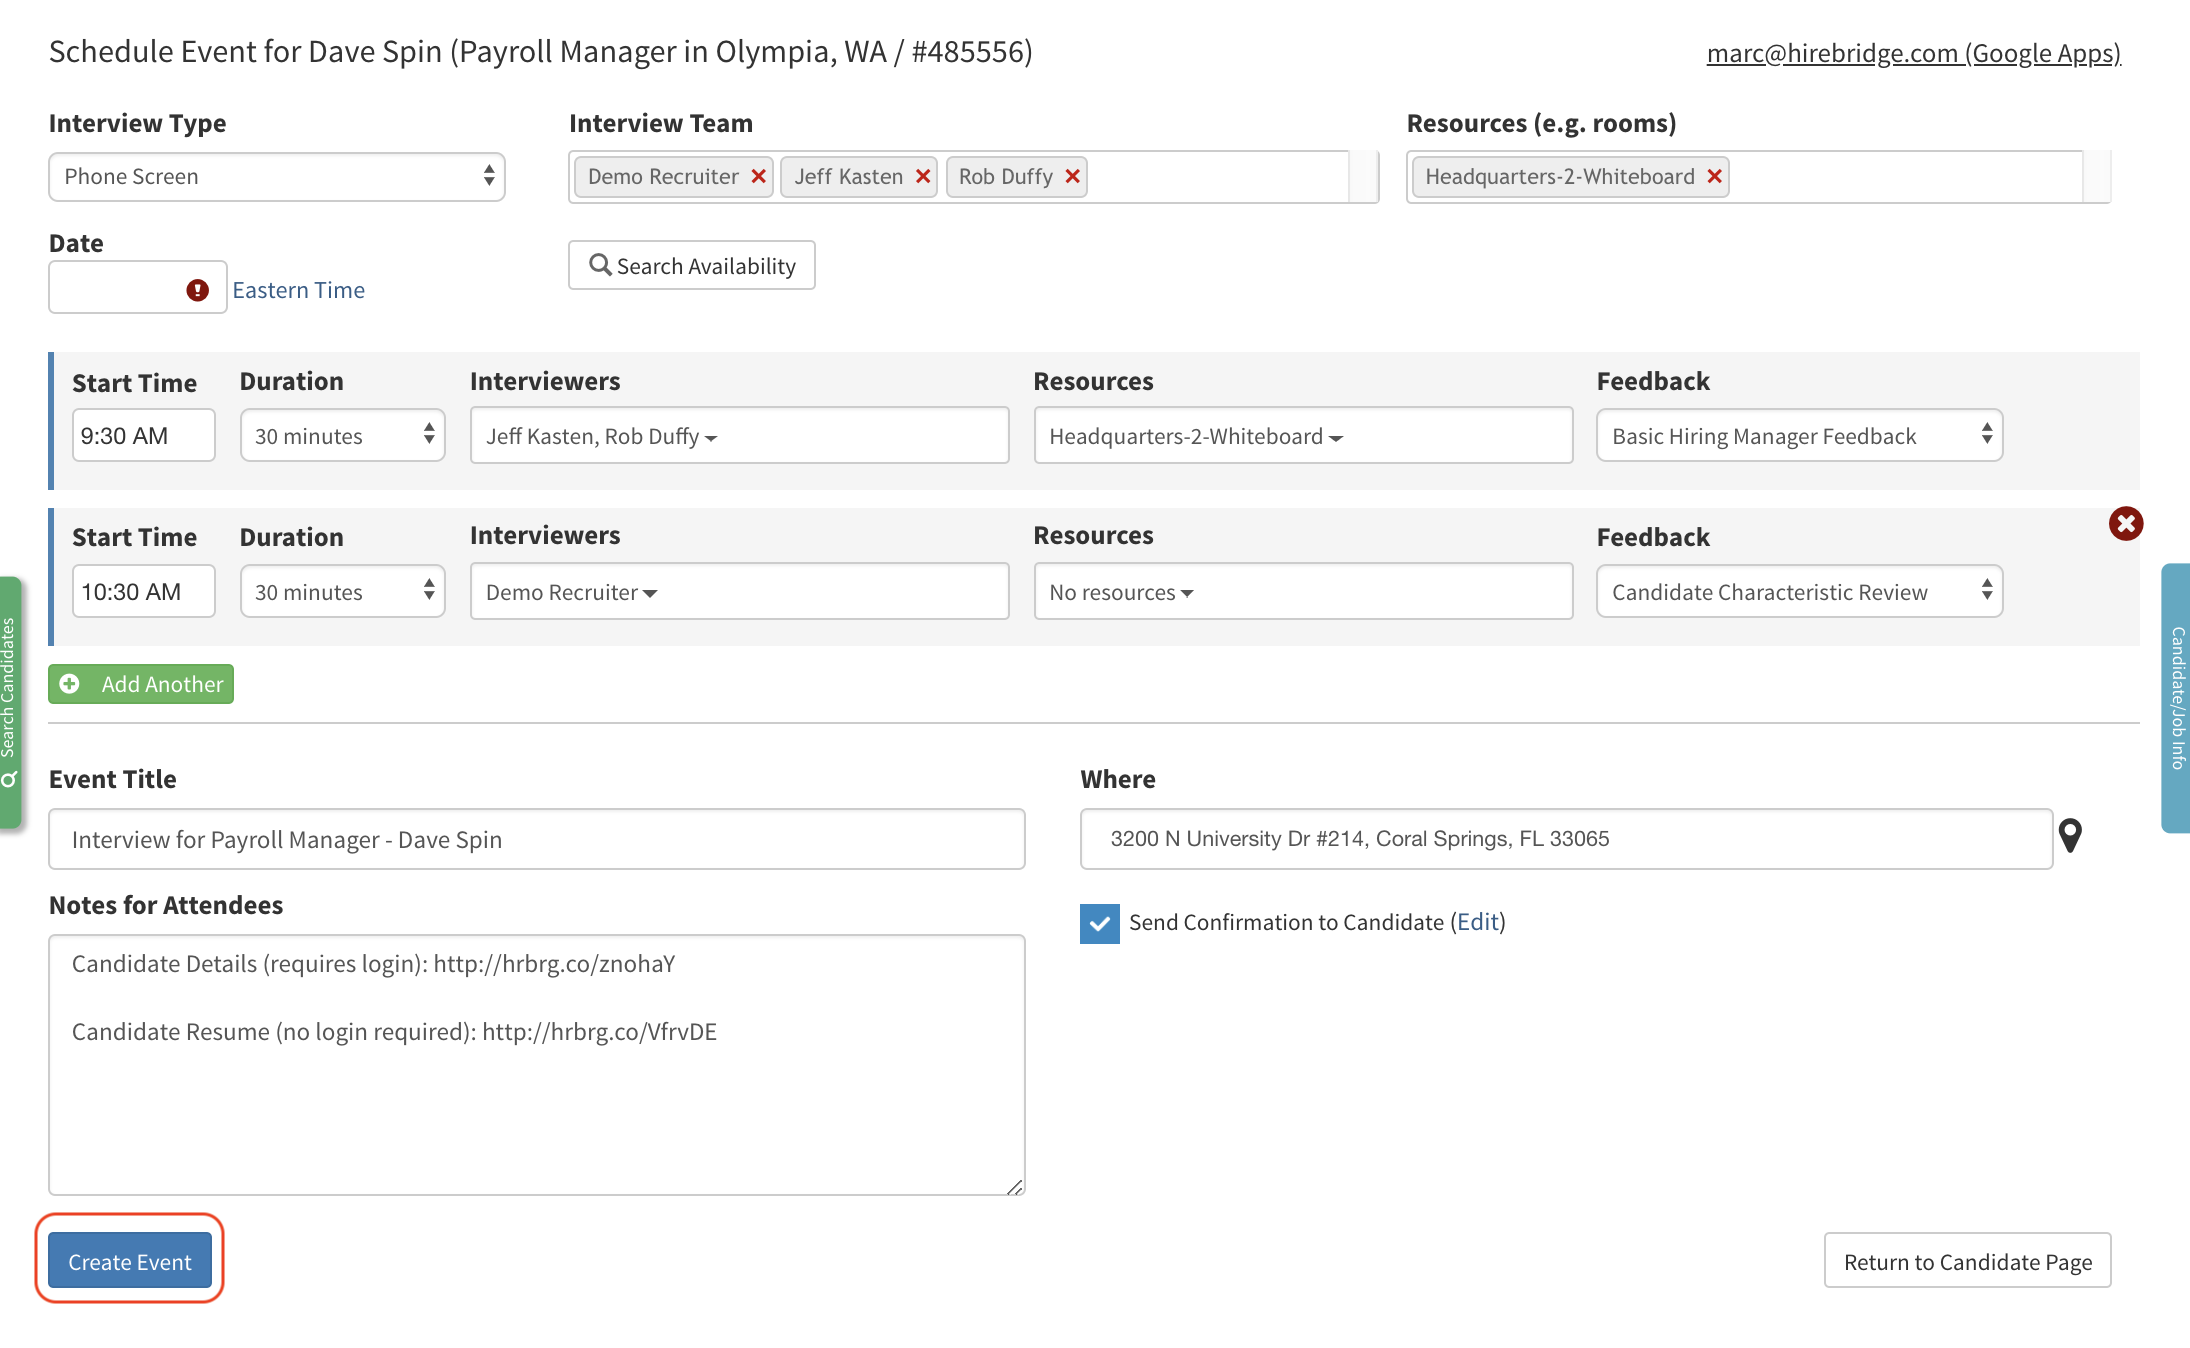
The first section we will cover the Interview Type, how to attach the interview team, attach resources, select timezone and select the interview date either by using the Search Availability tool or selecting a date.

Interview Type - This dropdown list will allow you to select the type of interview that will be conducted.
Interview Team - This section will allow you to attach Hirebridge users to the interview. You can attach multiple users to this section by typing their name and then selecting from the user list. To remove individuals who are attached to the interview team select the red "X".
Date - Dates can be entered by selecting the text box and timezone can be set by selecting the current timezone next to the text box. Selecting the text box will load a calendar in which you can select dates.
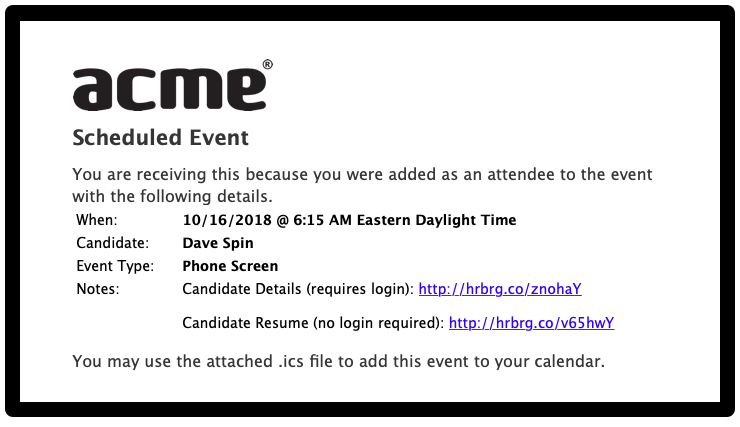
Note: If you have not setup your Calendar account, you will not see an email address in the top right corner. The Create and E-Mail iCal File option will still send a calendar invite via email that will contain ICS Calendar file. (Sample Email below)
If you have a calendar setup Resources and Search Availability will become available.
For more information to setup your calendar Click here
Resources - items or places that can be scheduled for the interview. To attach resources this can be added via calendar service provider.
- For example if the interview requires a projector and room it can be attached in the resources section.
Search Availability - This tool will allow you to view the availability of resources and the attached interview team.
For more information on Resources and Search Availability Click Here.
The next section will cover how to create and select the panel interview times.
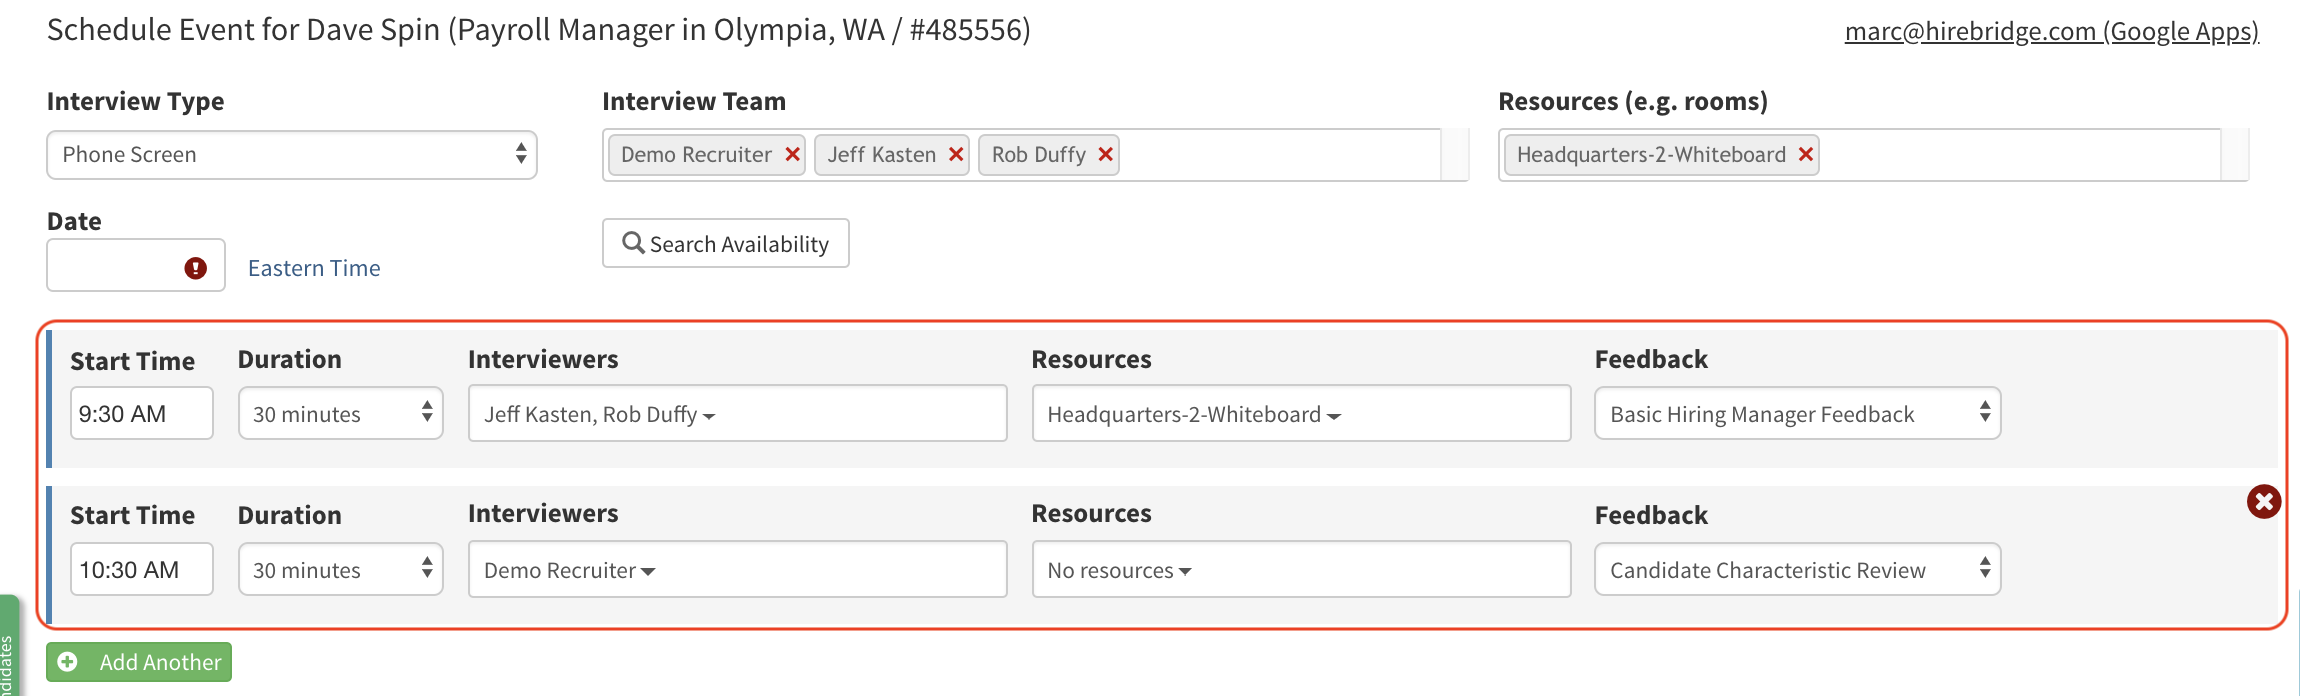
In the outlined section above you can set the Panel Interview times and interview information.
Start Time - Start Time of the interview
Duration - Duration of the interview
Interviewers - Interviewers that are available from the Interview Team
Resources - Resources that are available
Feedback - Feedback Question sets for the Interviewers.
Once the interview times are set the scheduler will have the event created in their calendar. Each individual who is attached to the specific interview time will receive an email that will have the interview information.
- To add more interview times select Add Another outlined in the image below maximum.
(Maximum 6 interview times) - To delete the interview time select the red "X" to the right of each row.
(Outlined in the image below)

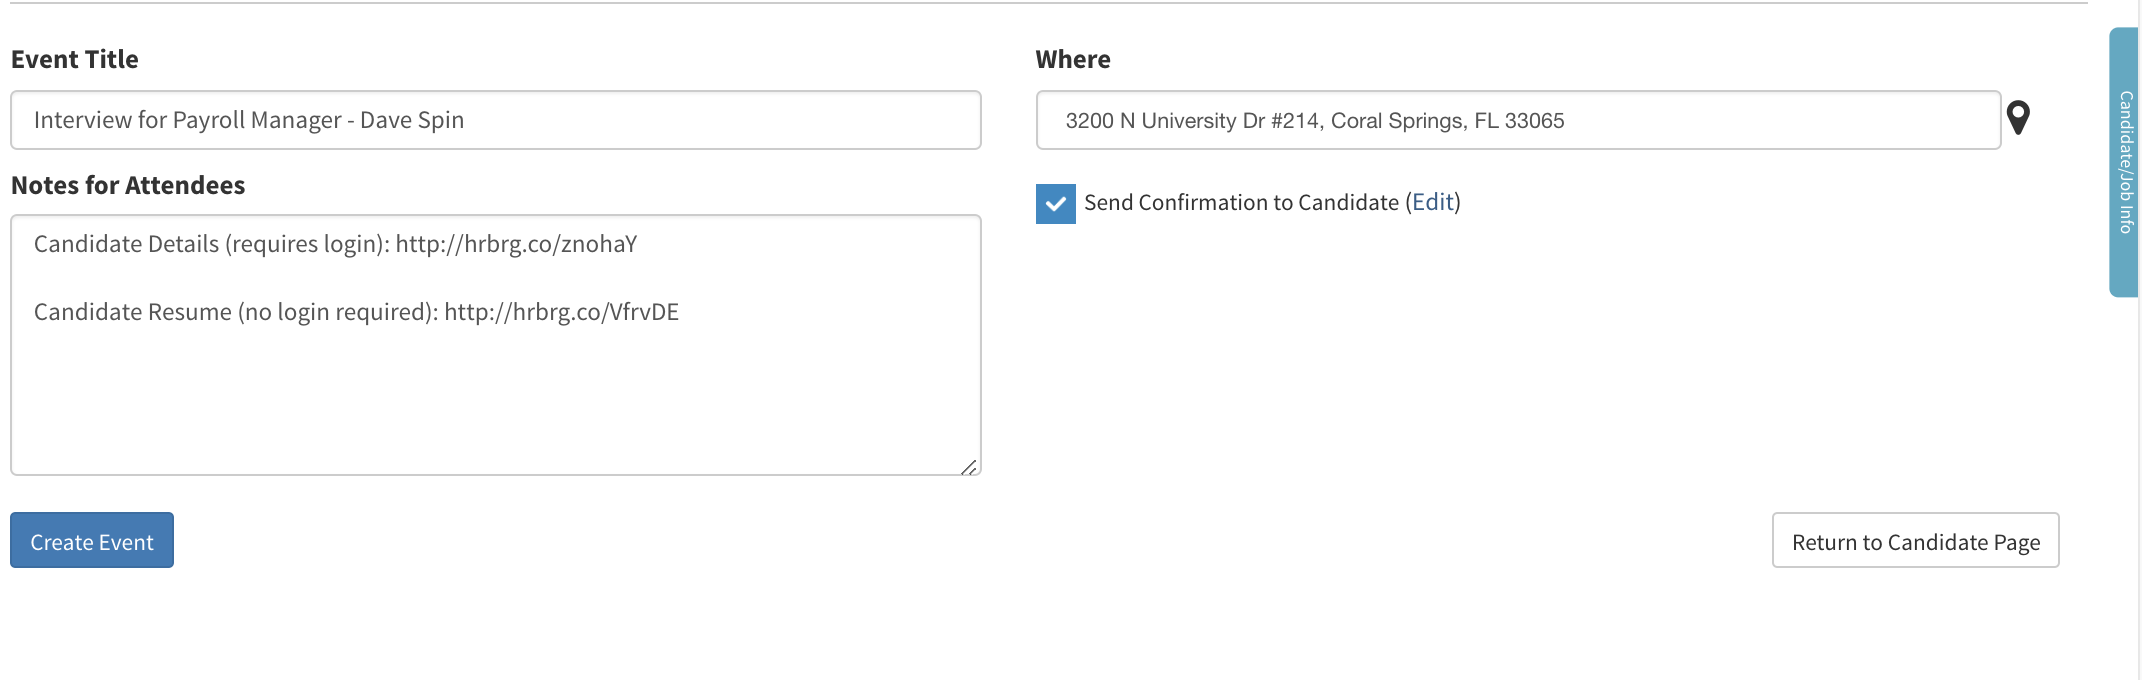
The last section of the Panel interview Scheduler will allow you to edit information that will be sent out to the attendees such as Event Title, Notes for Attendees, and Location. Candidate confirmation email can also be edited in this section along with basic candidate information can be displayed on the right side of the screen.
(Image provided below)
Attendee Email Information
Event Title - This section allows you to edit the title of the event for attendees.
Where - This text box allows you to input an interview address. Selecting the teardrop icon next to the text box will allow you to search for an address using google maps.
Notes - This section will allow you to add/edit notes for attendees.
Candidate Email Information
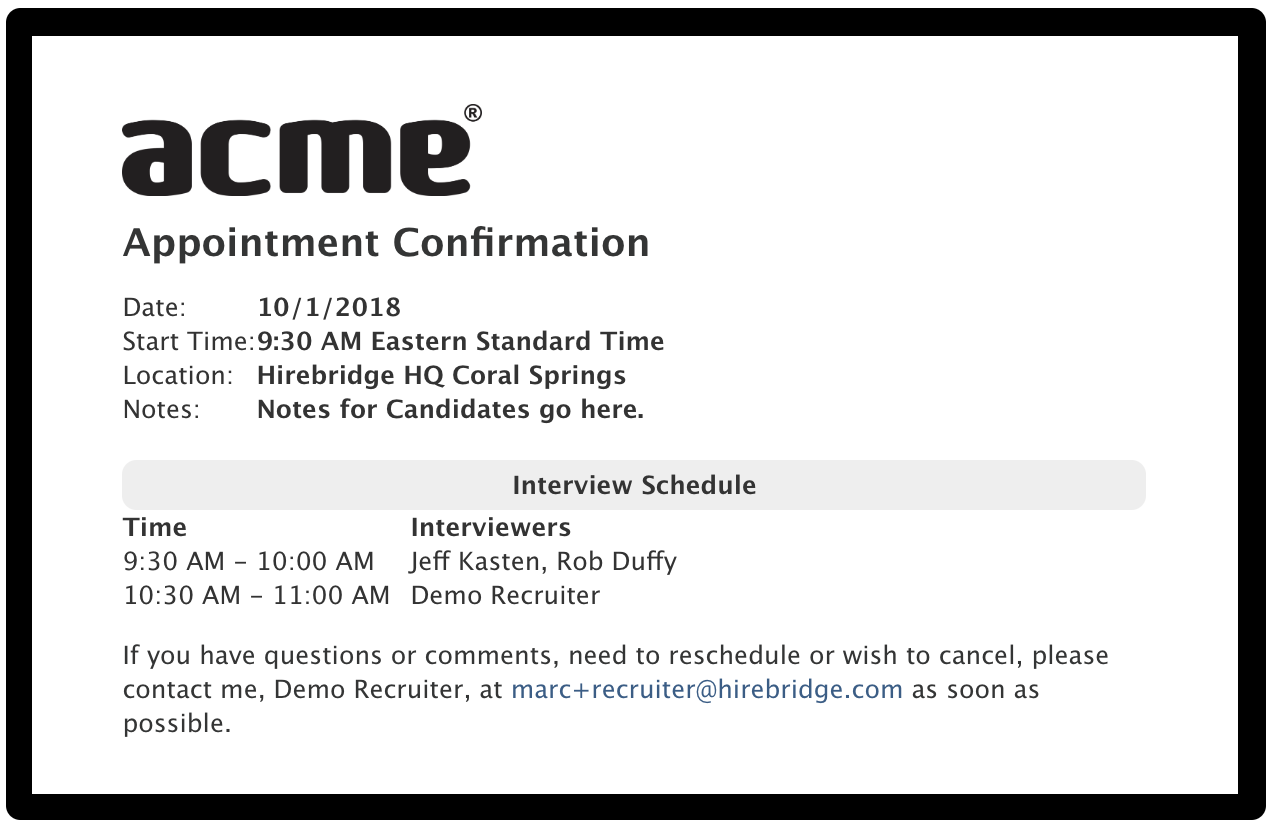
Send Confirmation to Candidate - Checking the box next to the to the text without editing will send the candidate a default email (Sample image of candidate appointment confirmation)
Selecting the Edit text next to the Send Confirmation to Candidate will allow you to edit the subject, where, and location. You can also select and preview the email template you would like to send to the candidate.
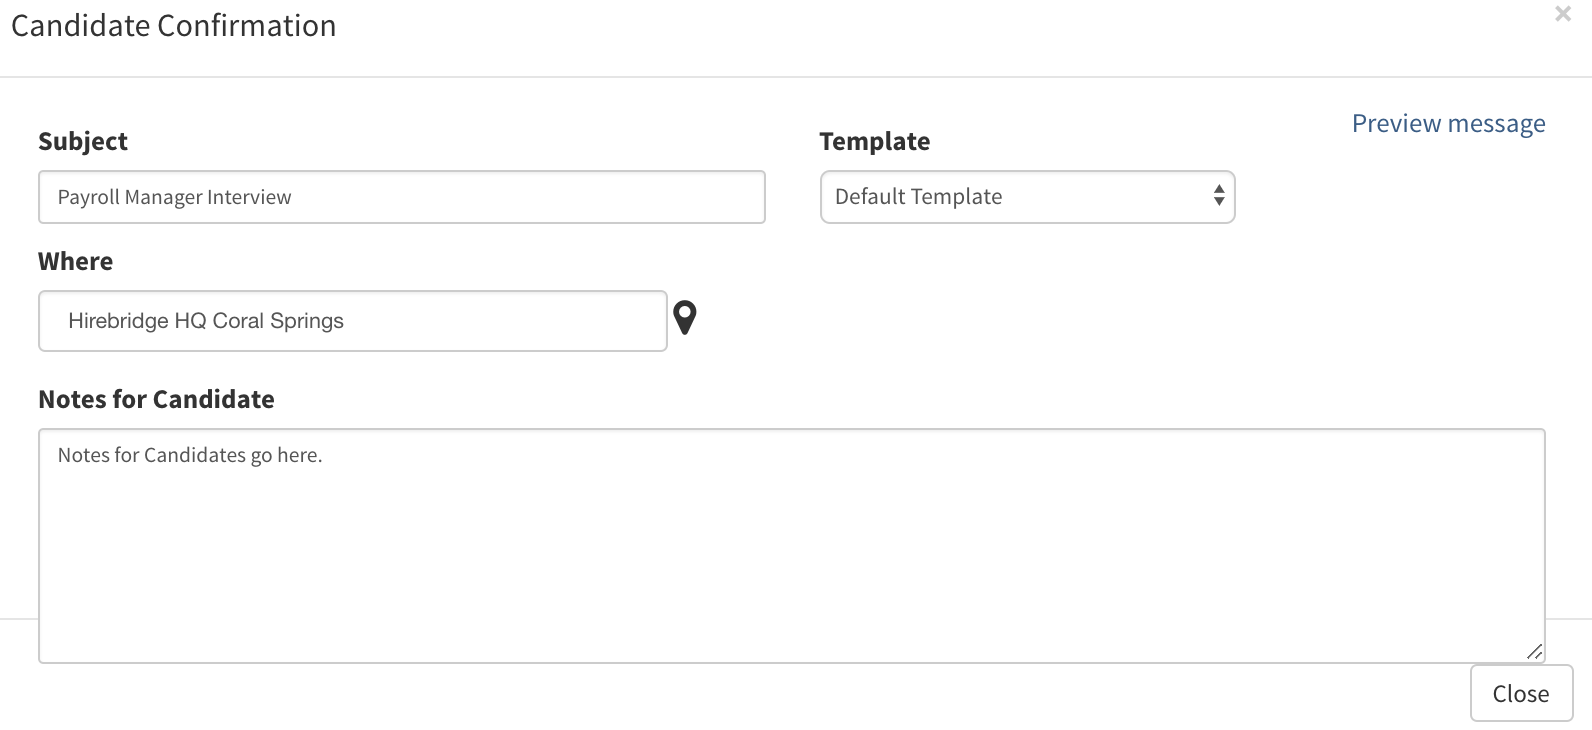
Below is a sample of how the message will be displayed when clicking Preview Message.
Once you have all of the interview information populated the next step is to create the event for the attendees and candidate.
Selecting the blue Create Event button at the bottom left corner of the page will create the interview and invite all of the attached individuals for this interview. (Outlined in the image below)
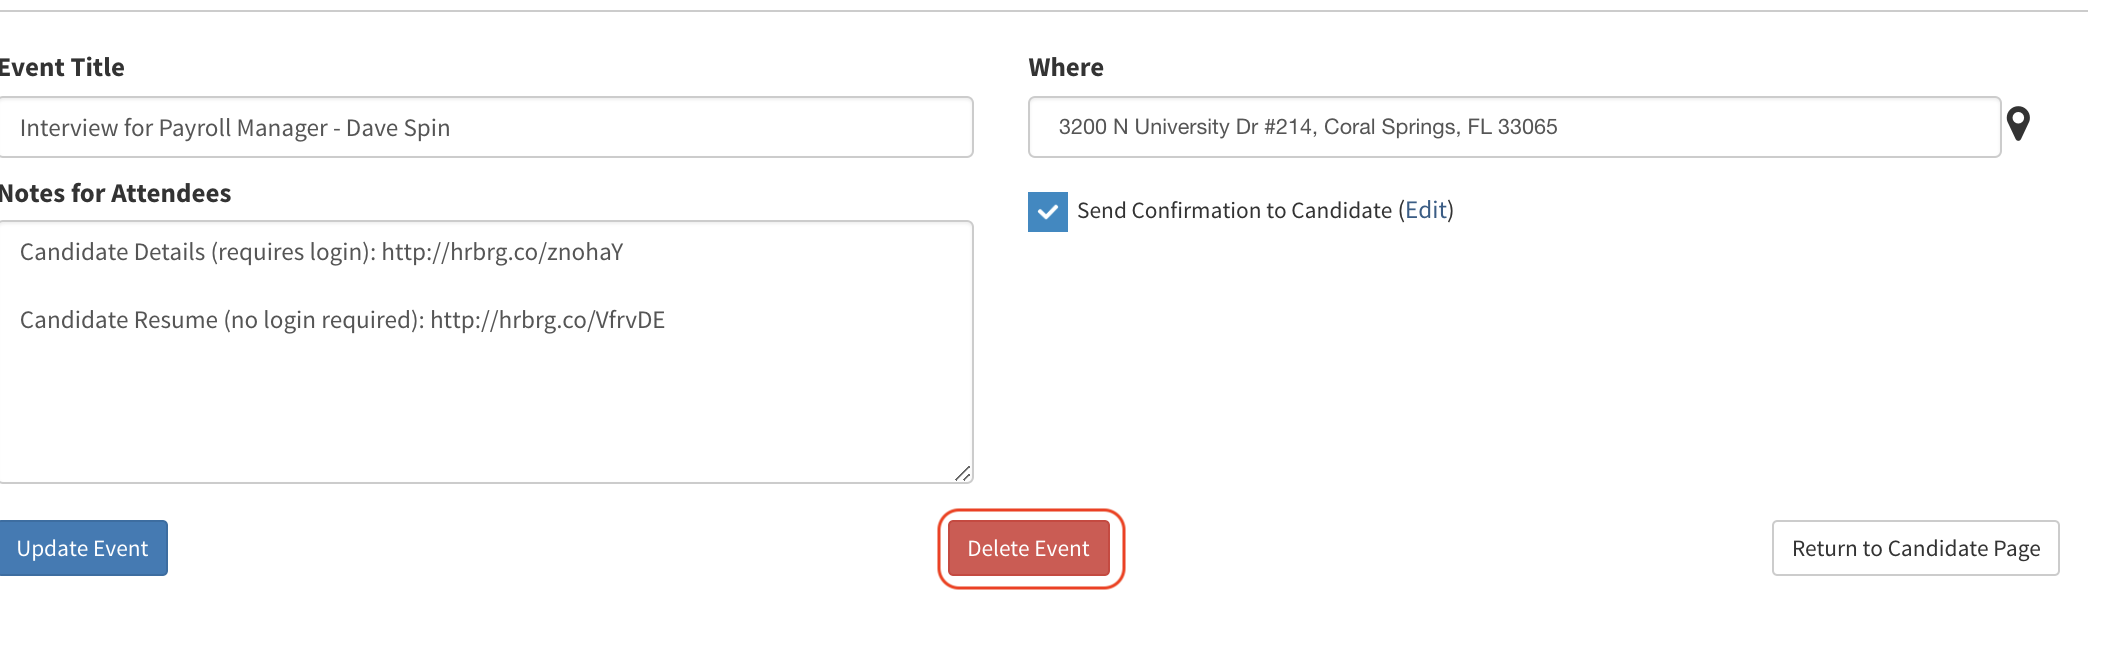
- When the event is created the page will then load a Delete Event button at the bottom of the page which will allow you to delete this event.
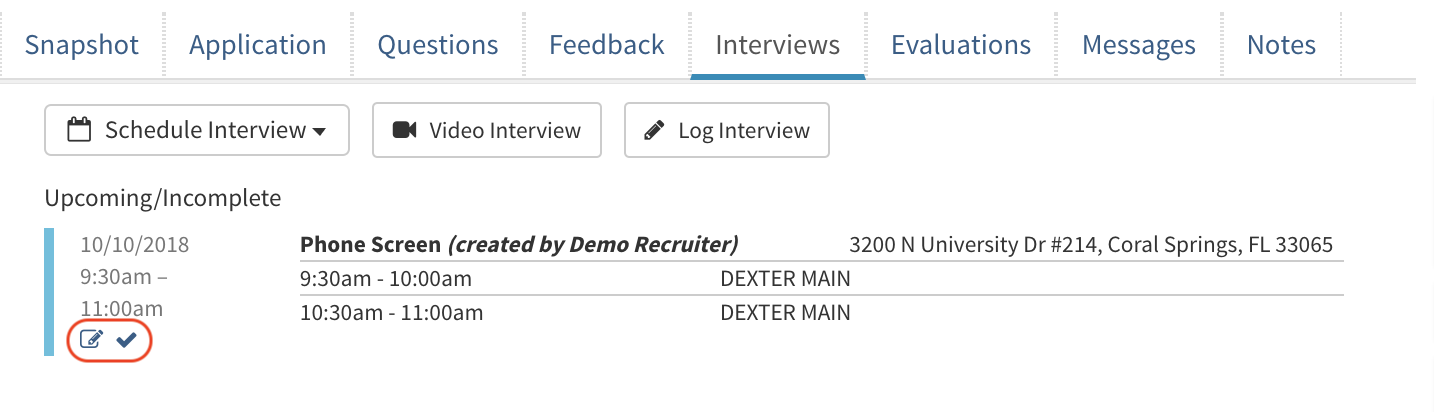
- Going back into the candidate profile, in the Interviews tab you can edit the interview event or mark the interview as complete
Note: All parties attached to this even will also receive a notification that the event has been cancelled.
Video Tutorial