This article will cover how to set up the delayed regrets e-mail feature.
- The first step is to make sure the feature is turned on.
- Select your username in the top right corner, this will open a drop-down menu.
- From the drop-down menu select "Administration", this will take you to the "Administration Control Panel.
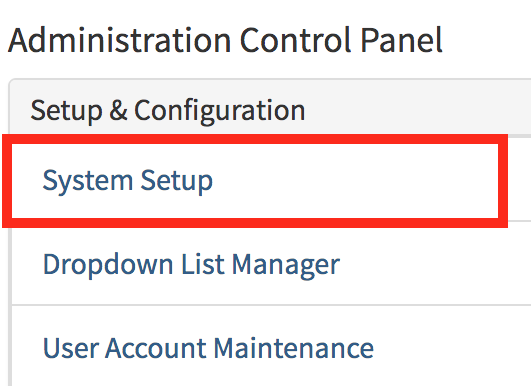
- On the "Administration Control Panel" page is where you will select "System Setup"
- Once you have selected system setup select the "No Interest Rules" tab.
- Checking the Delay Sending Email checkbox will enable the delay when you "No Interest" a candidate.
- Once you have checked the box you will then need to type in the number of hours to delay the no interest message in the text box.
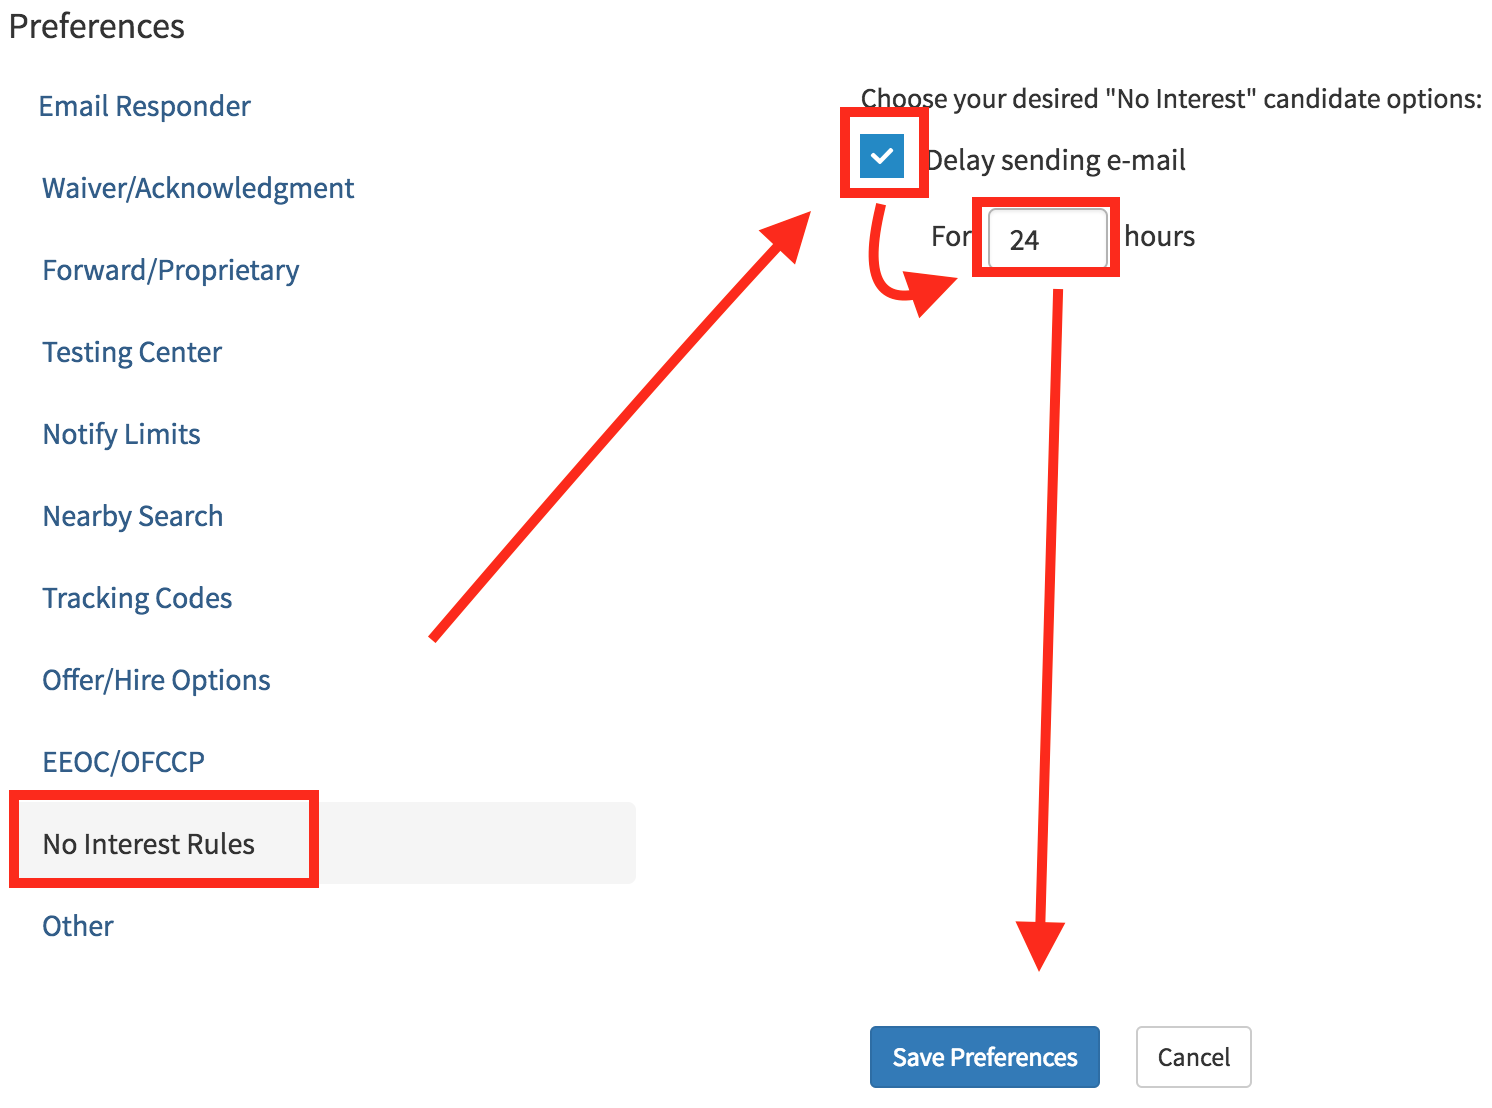
- After you satisfied with the delay time select the blue "Save Preferences".
- All "No Interest" messages will now be delayed within the specified time.
How to Manage Regrets Email Queue
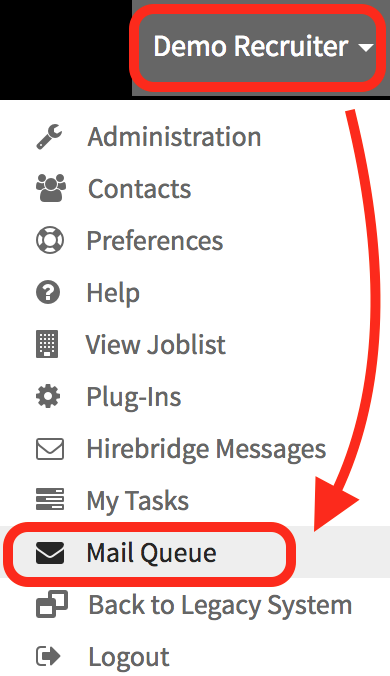
- In order to manage the Regrets Email Queue select your username in the top right.
- From the drop-down menu select "Mail Queue".
Once you have selected the "Mail Queue" it will take you to the Deferred Mail Queue page.
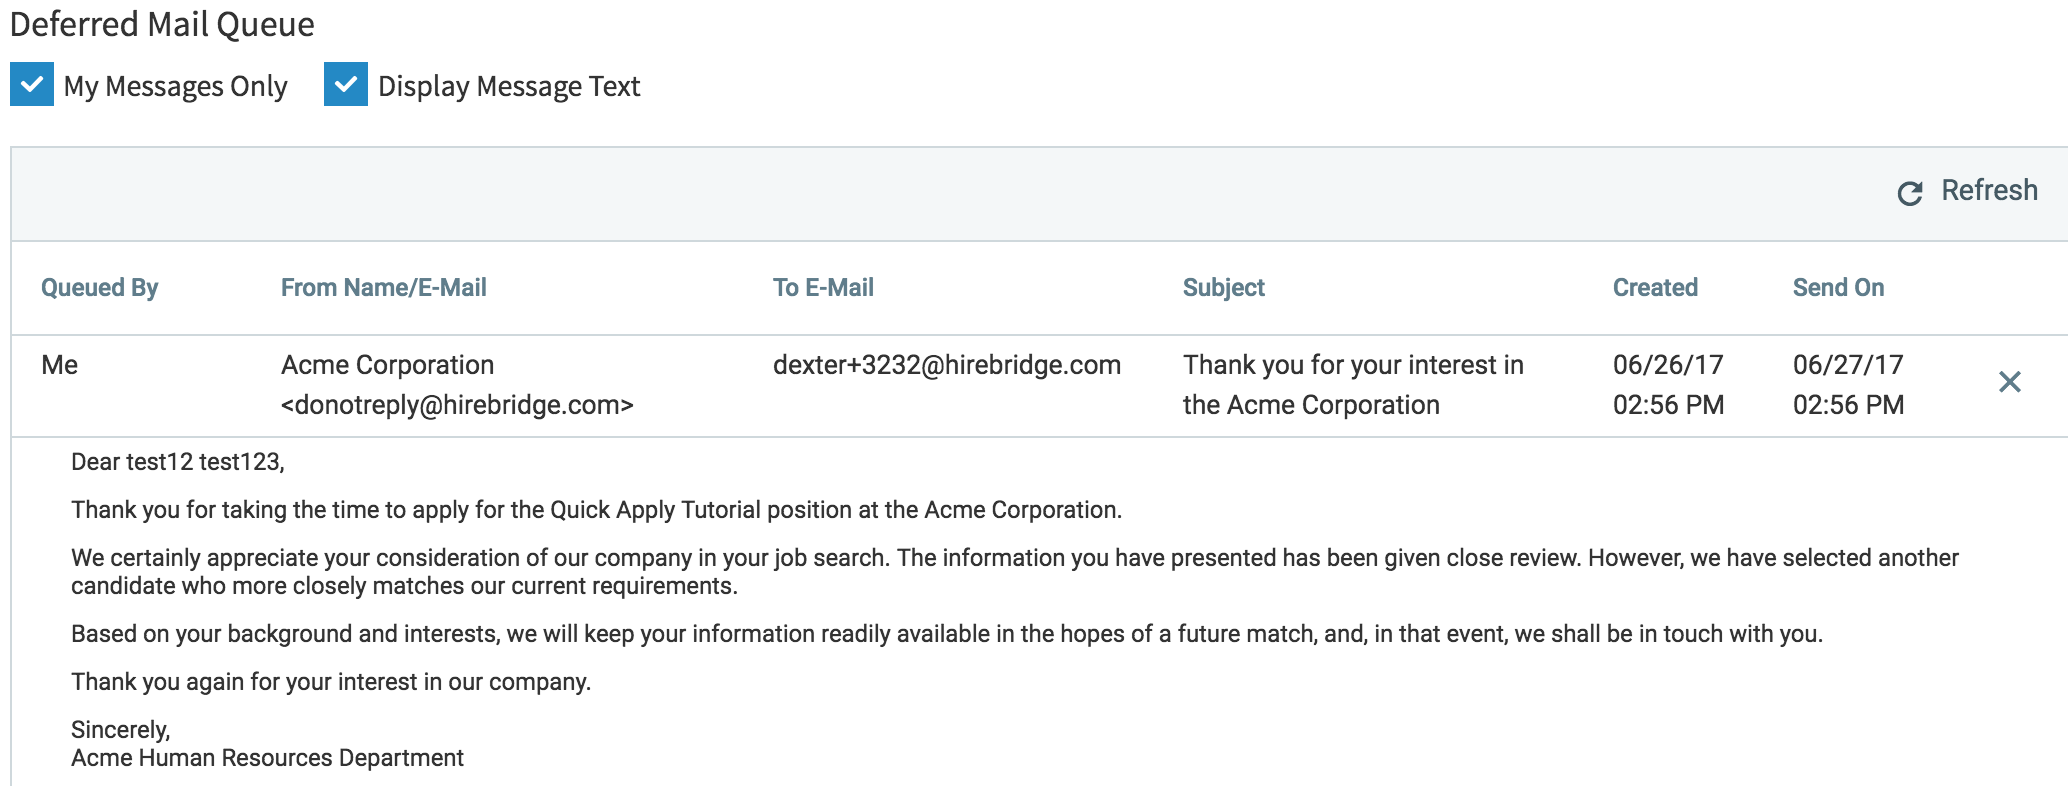
- This page will allow you to view regret emails that are in the queue to be sent out to candidates.
- You can also view the message that was included in the in regret email by selecting the "Display Message Text" checkbox.
- Administrators can see their own regret emails along with other regret emails that are waiting to be sent out.
- To delete/cancel an email Queue select the "X" on the right side.