Steps to creating a new job
- In the Navigation bar on the top click the plus sign.

- After you have clicked the plus icon as shown in the picture above a drop-down menu will appear.
- Now select “Add Job”.

- You should now be on the Job Requisition Editor page.
- This page allows you to create a job by either filling in the form with all required fields or by using a job template.
- To use a job template in the top left corner select the drop-down list of templates
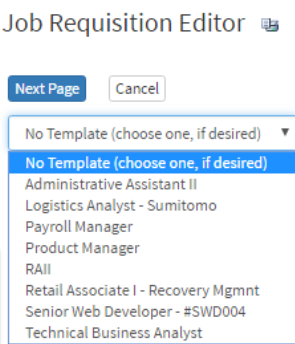
- If choosing a template, the form will be populated accordingly.(Some fields are still required to be filled)
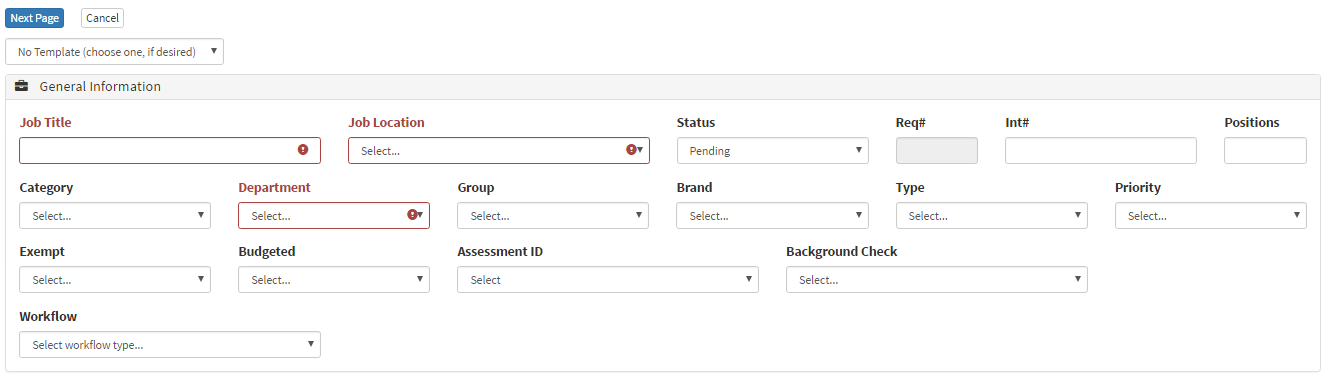
- If manually entering information the required fields will need to be filled in by the user.
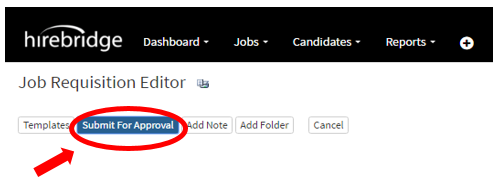
*Based on user profile/company settings you should see a blue button labeled either “Submit For Approval” or “Next”*
- After you have filled in the required fields to create the job click the
- “Submit for Approval” button in blue.
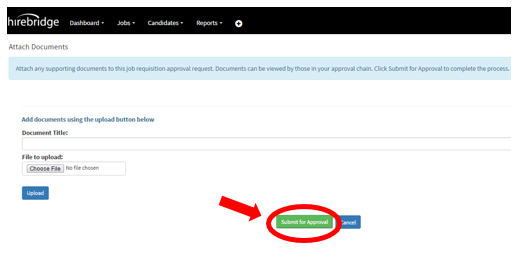
- The next page will now allow you to attach any supporting documents for those in your approval chain to view.
- Click the “Choose File” button to select the documents you want to upload.
- Then click on the blue “Upload” button below it to upload the files into the system.
- To finish and create the job click on the green “Submit for Approval” button.
- The requisition will now have to be either approved by a chain of approvers or will be created based on company settings.