This article will cover how to create a workflow.
- The first step is to select your username on the top right corner
- This will open a drop-down menu, where you will need to select "Administration".

- The "Administration" tab will now take you to the "Administration Control Panel".
- Under the "System Utilities" column at the bottom select "Workflow Maintenance".

- This is where you can Add/Edit/Duplicate/Delete workflows.

 |
- This icon allows you to edit workflow |
 |
- Duplicates the current workflow |
 |
- Deletes the current workflow |
 |
- Allows you to create a new workflow |
When creating a new Workflow select the blue "Create New Workflow" button.
This will now take you to the "Workflow Editor" page.
- The first step is to include a title.

- Once the title has been created the second step is to select "Add Step".
- This will allow you to Add a Workflow Step.

Workflow Step Type - This is where the candidate will stage into this step.
Title - This is the title of the step
User Instructions - Include instructions for the user
Milestone Log Action - This will let you log certain steps in the milestone.
Action Buttons - Allows you to select what type of action can be taken at that step. (Pictured below is where the "Action Buttons" will appear)
Available Action Buttons -
- Assessments - Gives the ability to request the assessment
- Background Check - Gives the ability to request a background check
- Copy Candidate - Gives the ability to Copy Candidate into another requisition
- Email - Gives the ability to email candidates within the Hirebridge system
- Feedback - Gives the ability to request feedback on the candidate
- Forward - Gives the ability to forward the candidate to a specified user
- Hire - Gives the ability to Hire a candidate
- Information Request - This action button will give the ability to request the candidate to update information
- Interview - This button will allow the candidate to schedule an interview.
- Move Candidate - This button will allow you to move the candidate into another requisition
- Note - This button will allow you to enter your notes into the candidate profile
- Offer - This button will allow you to create an offer for the candidate
- Send to Manager - This action button will send the candidate to attached hiring manager
- Task - To Schedule an interview
- Question Set - This button will allow you to send the candidate a question set.

Once you have created a step you can select the blue "Save" button.
You can add as many steps as needed and can organize the steps by simply dragging and dropping them in place. (Pictured below)
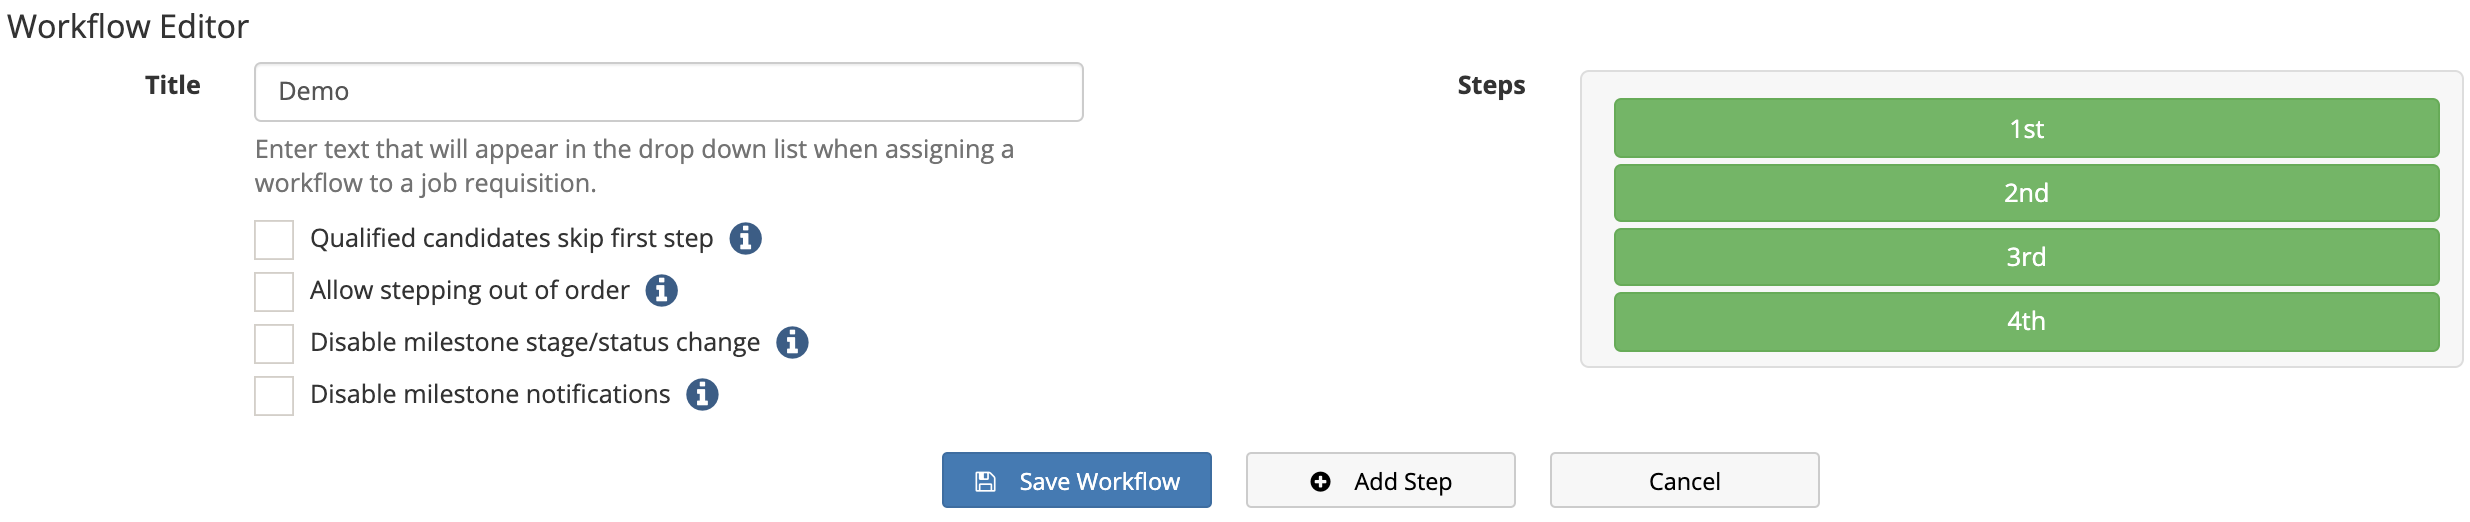
- Qualified candidates skip first step - If this is checked and candidates answer a question set and are not disqualified by their answers, they will be automatically advanced to the 2nd workflow step.
- Allow stepping out of order- If this is checked, users will be allowed to jump around within the workflow. Steps will not have to be completed in order. Once enabled, you will no longer see the Advance button at the bottom of the workflow panel and will have to click on the workflow step to which you want to advance.
- Disable milestone stage/status change - If this is checked, when setting the Advancing or Reject milestone it will not set the candidate stage or status specified in the milestone configuration, if any.
- Disable milestone notifications - If this is checked, when setting the Advancing or Reject milestone it will not send notifications as specified in the milestone configuration, if any.
Once satisfied with the Workflow you can now save the Workflow by selecting the blue "Save Workflow" button.