An email signature is a fundamental aspect of professional digital communication. It offers a touch of personalization and provides essential contact information. This tutorial will guide you through the simple process of adding or editing your email signature, ensuring your emails always carry your personalized stamp.
-
Step 1: Accessing the Menu
- Click on your name located in the top right corner of the page. This action will reveal a drop-down menu.

-
Step 2: Navigating to Preferences
- In the drop-down menu, find and select the “Preferences” option.

-
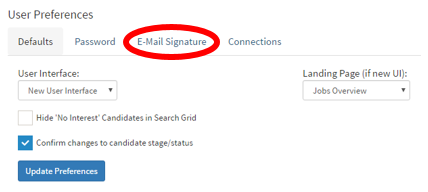
Step 3: Accessing the Email Signature Settings
- Once you’re on the “User Preferences” page, look for the “E-Mail Signature” tab.
- Click this tab to proceed to the email signature editing section.
-
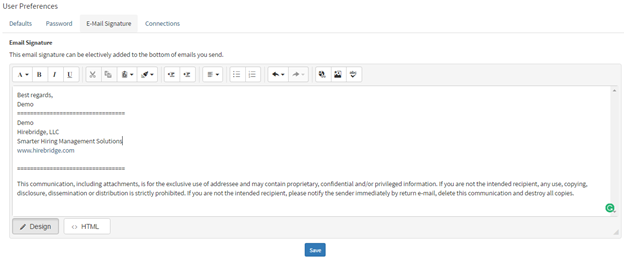
Step 4: Editing Your Signature
- In the “E-Mail Signature” section, you'll find a space to create or modify your email signature.
- This area allows you to input your name, role, contact details, or any other information you wish to include in your signature.
-
Step 5: Saving Your Signature
- After adding or making changes to your email signature, remember to click the blue “Save” button. This step is crucial to ensure that your modifications are stored and applied to your future emails.
By following these simple steps, you can easily add or edit your email signature, lending a professional and personalized touch to your email correspondence. A well-crafted email signature not only provides necessary contact information but also enhances the professional appearance of your communications.