This article will give you a basic understanding of how to manage your dropdown list.
- To access the dropdown list manager select your username in the top right corner.
- A drop-down menu will appear, select "Administration".

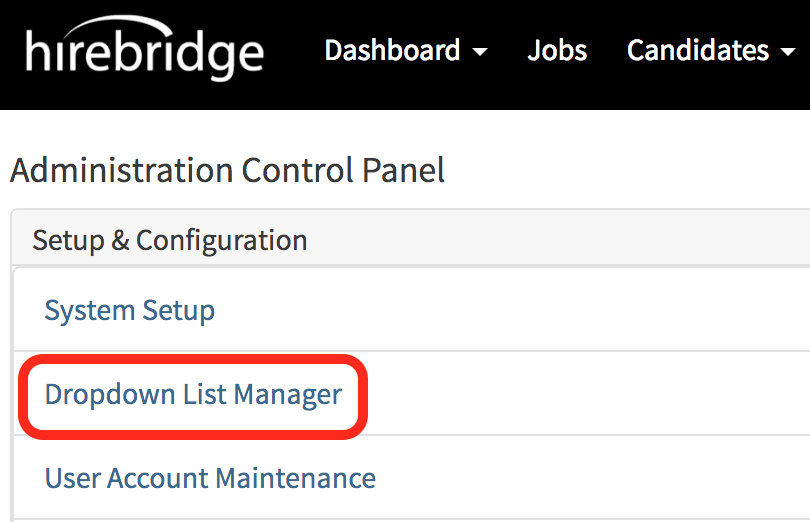
- This will now take you to the "Administration Control Panel" page.
- On this page, you will select "Dropdown List Manager"
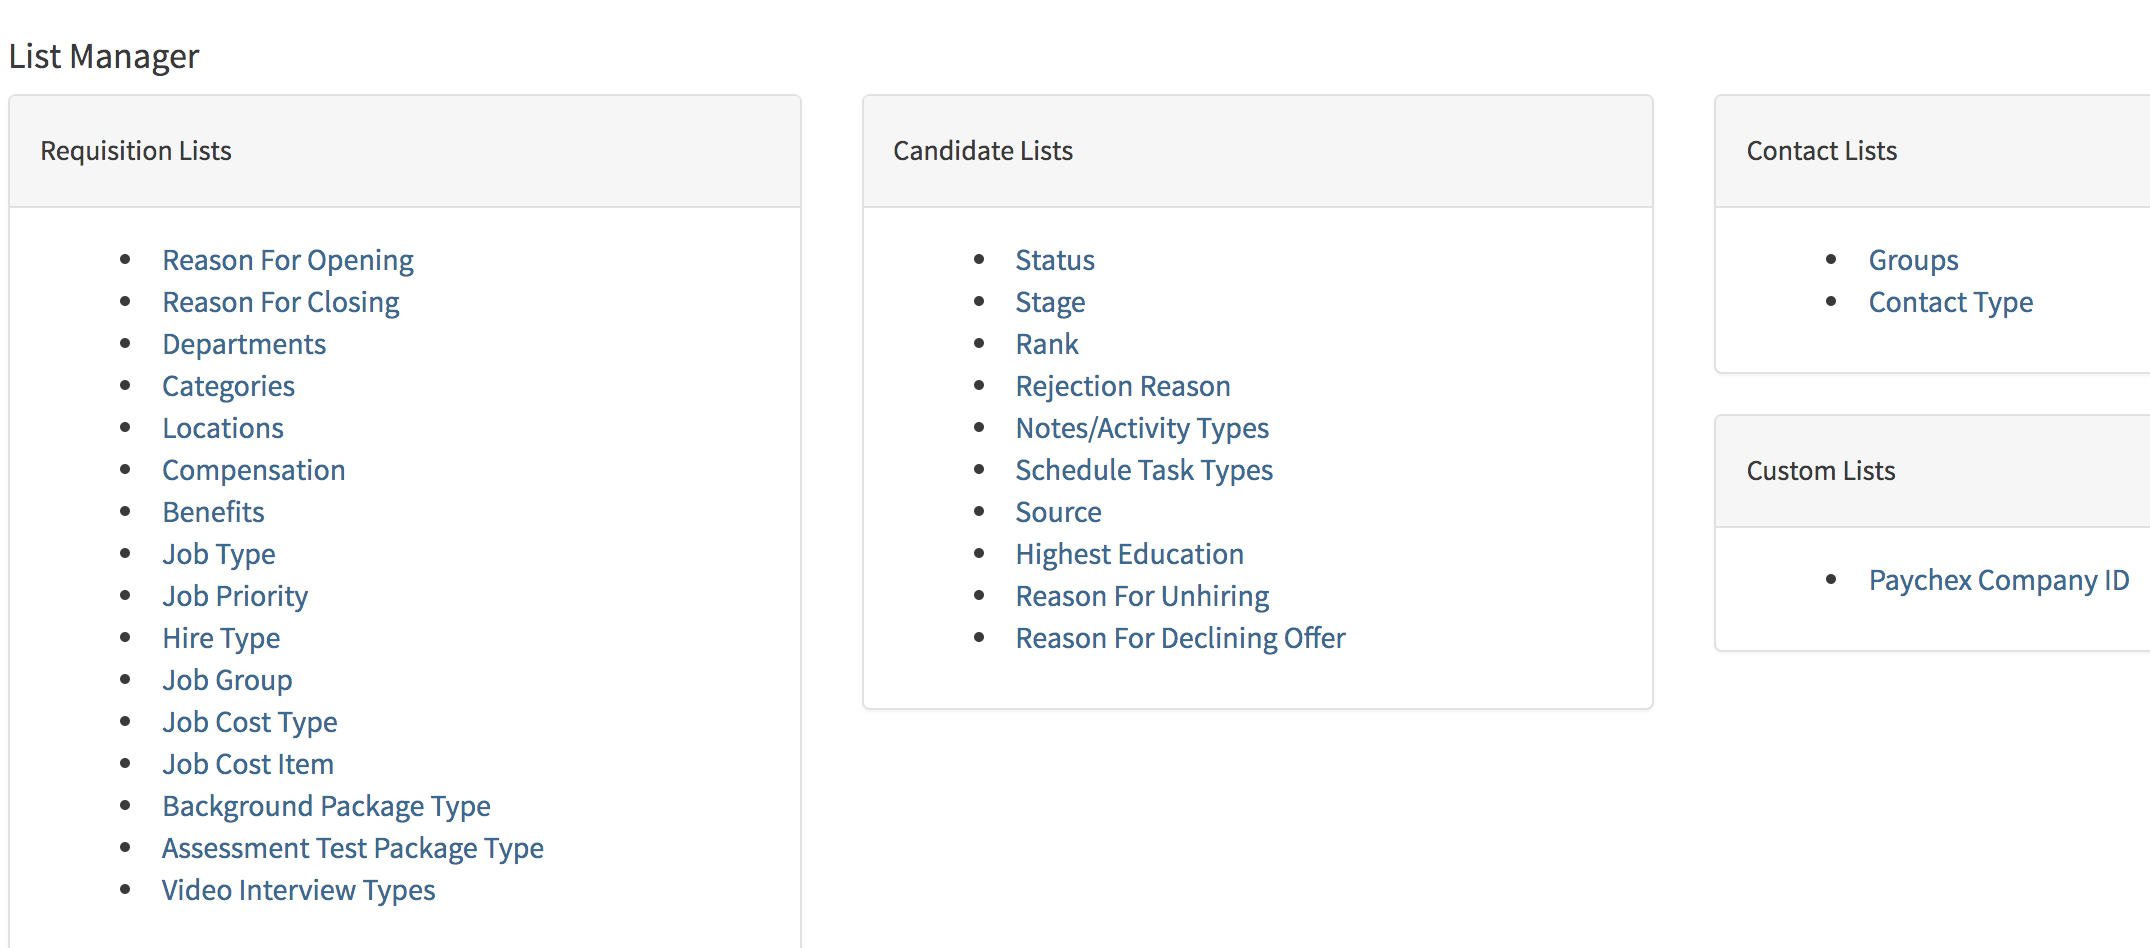
- This will now take you to the "List Manager" page.
- There will be four sections of the type of lists that you are allowed to manage.
- Requisitions Lists
- Candidate Lists
- Contact Lists
- Custom Lists
- For this example, we will cover how to add/edit "Reason For Opening" dropdown list.
- Under Requisition Lists select "Reason For Opening"
- This will take you to the list manager for "Reason for Job Requisition"

- Below is a list of icons and their functions on how to add, edit and delete reasons for the requisition.
 |
- Allows you to edit reason for job requisition |
 |
- Deletes reasoning for job requisition |
| - Add a reason for job requisition | |
| - Back to the list manager | |
| - Allows you to import Reason for Job Requisition | |
| - Allows you to download all the reason for job requisition |
- When you add or edit any of the items most of the drop-down list managers excluding locations and status. It will only require you for a Name and Usercode. (Pictured below)

- Locations and Status are the only dropdown list managers that will require you to enter additional information.
Dropdown list items can be made inactive and active items.
- Active items will display in the drop-down list, this is performed by checking the box illustrated below.

- Inactive items will not display in the drop-down list, this is performed by unchecking the box illustrated below.
